Hello.
I will make a small topic about manipulating elements in the menu.
This particularly case manipulates images, but the idea is to be a foundation to use with other ideas or needs in your custom system.
This small tutorial require some Scriptcase knowledge (v 8.1) and some minimal JavaScript coding and code debugging in which I won’t detail myself.
Lets start:
-
Create a new menu, in my case named “simple_menu_example”, add a couple items and link them to a couple other apps.
-
By default your menu should open in tabs, but double check if the flag “Open items in a tab” is set to “Yes” in your settings.
2.5) (Can be skipped) - In my example I will go to Layout > Visual Settings and set my header to “Default”
-
Go into Layout > Header & Footer and check “Display Header” to “Yes”.
-
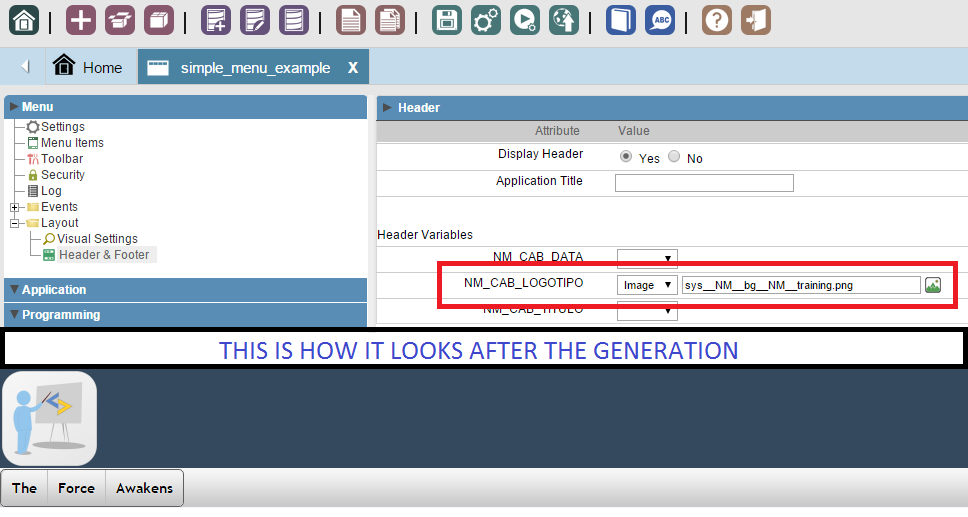
Set one of your header variables to “image” and choose any you like, my example is in the image below.
Note: Although I am using the default header template, its recommended that you code your own header template for better customization and maintenance of the code.
[ATTACH=CONFIG]n64149[/ATTACH]
- Inspect your menu’s HTML and you’ll notice that it builds a JavaScript calls for each element dynamically.
[ATTACH=CONFIG]n64150[/ATTACH]
- Based on this go to Events > OnLoad and write the following code there just to test.
?>
<script>
    window.onload = function() {
        $(document).on('click', 'li > a', function() {
            alert(this.id);
        });
    };
</script>
<?php
-
Whenever you click on a menu item it will display an alert with its id (item_1, item_2, item_n…)
-
We need more images in the app so we can switch images: Go to Application > Settings. Add more Images here.
In my case I added 1 for each menu item: “fluxocaixa.png”, “news.png” and “helpdesk.png”. -
Generate your app. Go to your Scriptcase folder > app > project_name > _lib > img and search for your images.
They should be there under the with a different, but similar name.
In my case: “sys__NM__bg__NM__fluxocaixa.png”, “sys__NM__bg__NM__news.png” and “sys__NM__bg__NM__helpdesk.png” -
Now go back to the onLoad event and finish your coding by creating a function to swap images based on the menu item that was clicked.
Like this example below:
?>
<script>
    window.onload = function() {
        $(document).on('click', 'li > a', function() { /* calls this function whenever an "a" object inside a "li" object is clicked */
            myFun(this.id);
        });
    };
    /* links each menu item to a different image, in case your "id" is empty or does not exists it does */
    function myFun(id_menu)
    {
        var path_to_image, image_name;
        switch(id_menu)
        {
            case 'item_1':
                image_name = 'sys__NM__bg__NM__fluxocaixa.png';
                break;
            case 'item_2':
                 image_name = 'sys__NM__bg__NM__news.png';
                break;
            case 'item_3':
                 image_name = 'sys__NM__bg__NM__helpdesk.png';
                break;
            default:
                 image_name = false;
        }

        if (image_name !== false)
        {
            path_to_image = $('.scMenuHHeaderFont > img').attr('src').split('/');
            path_to_image[path_to_image.length - 1] = image_name;
            $('.scMenuHHeaderFont > img').attr('src', path_to_image.join('/'));
        }
        else
        {
            return false;
        }
    }
</script>
<?php
Eureka!
This should be the result.
[ATTACH=CONFIG]n64151[/ATTACH]


